Sunday, August 23, 2015

I totally meant to do this II: THE MERINGUENING

The title of this week's post was going to be "meringue: your needy friend who's fun to be with", but because of some tinkering on my part and no plan B, we are now delving once again into the world of when cooking goes wrong...but I'm getting ahead of myself. 

Meringue in its purest form is whipped egg whites, but this doesn't cover the sheer magnitude of uses being able to make a good meringue can have in your kitchen. The foamy texture of a well done meringue is unique. It can can used as a pie topping, a fold-in ingredient for cakes to give them extra lift, the base for an angel food cake, or for cookies. I'm sure there are a lot of other uses, but i don't want to make this into one big list, because what fun would that be? It can be prepared with many different flavors, as long as it is done correctly. Like, if you substitute one sweetener for another and you don't listen to your mom saying it probably won't work...wait...getting ahead of myself again.

The downside to making meringue is that it is super picky. There are a dozen different ways a meringue can go wrong, but I will outline the method I use to make my meringues with a pretty high success rate. I will also show you the method I used today, which so far has a success rate of 0 but can be salvaged into something pretty tasty that looks like a cookie.

Some cooks, and pretty much every commercial bakery that I know of, stacks the cards in their favor by using cream of tartar, a stabilizing agent that makes the meringue less likely to dissolve into a puddly goo of honey and sadness...and leave you in a panic, because you write a cooking blog and the people want their weekly dose of magic...but more on that in a few.

Anyway, if the world was perfect I would use cream of tartar because in a perfect world it wouldn't leave an aftertaste that ruins the entire dessert for me. As it is, I will explain my method for making meringue cookies that is cream of tartar free.

Meringue cookies
A less fluffy, but still representation of the wonder that is meringue cookies.


Ingredients:
2 egg whites
1/2 cup sugar


Seriously, that's it.

Directions:
You see how I listed egg whites up there? Well, you need the whites of an actual egg, not the egg substitutes that are available in the grocery store. Not too complicated, right? I mean surely you, as a beginning cook, knows how to do that. Nah, I'm just kidding. Here is my very first instructional cooking video on how to separate eggs.


I put the whites in a plastic bowl. That was not mere chance, but rather pure liquid genius on my part. You see, in order to make meringue, the conditions have to be just right. The stars must align, the heavens open up, and tiny cherubim lift your egg whites to the heavens. In laymen's  terms, for those of you who are not fluent in delusional, you need to make sure your yolks get to room temperature and stay there for the process. A plastic bowl does not retain the heat or cold as much as glass, metal, or ceramic bowls do, so that's why I always use them for meringue. Humidity and high altitude can also kill a meringue, so maybe save your meringue making session for after your sauna session in the mountains. I live in a flat, dry area, so generally neither of those elements factors in.

After you let the egg whites sit out for a while, preheat the oven to 300 degrees. Take the egg whites and beat them on high until they form stiff peaks. In case you can't see it well in the final picture below, stiff peaks is when you lift the meringue up with beaters or a spoon and the meringue forms a peak that points straight up. If the peak bends, then that's a soft peak and you're almost there, just keep on beating. It is really cool to watch those slimy egg whites turn into a fluffy, cloud-like mass. 


Now if i had been making my usual recipe, I would have taken my sugar and gradually added about a teaspoon at a time to the meringue and beaten well after each addition.

This did not happen.

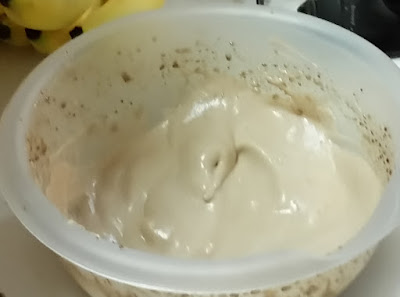
Instead, I wanted to try honey because it's a raw sugar and I wanted to try adding some chocolate flavored honey sticks as well as regular honey. I figured if I just kept whipping the meringue, it would be alright. It was not. Look at these photos if you dare:

No, don't do it!!!!

Oh the humanity!!!

Faced with a gloopy mess and a deadline (self imposed, but man I'm a jerk about it), I decided to finish out the steps. Full disclosure, I don't own a piping bag, and technically a piping bag is what is called for in this recipe. I know, I'm a horrible, piping bagless  person. I don't know how you'll ever forgive me.

I use a ziploc bag method instead that works well for simple stuff. First you put the meringue (or "meringue", in this case) in a gallon ziploc bag, squeeze the air out, seal it, and squeeze all the goodness into a corner. Cut the tip out of that corner (don't squeeze the bag when you do this, or at least record it if you do and send it to me) and voila! A down and dirty piping bag.


On a greased cookie sheet, I then make squiggles. You can make whatever design you want really--hearts, geometric shapes, octopi...ok, I really just like that word but you could, nonetheless. Once you have covered the cookie sheet with your own creativeness, stick it in the oven and bake 30-45 minutes or until the cookies are dry.


Not as many cookies as one may hope...


Mine actually don't look bad, as can be seen in the picture at the beginning of the recipe, but it is supposed to make about double what is pictured. I do hope you try these tasty, cheap, fun cookies and learn from my mistakes. Let me know what you think if you do.

Wednesday, August 19, 2015

Wednesday tips - setting up your kitchen like a BOSS

For those of you who took the time to read my "why are you doing this?" Page (that's so much more fun to say than "about" page), you know that I have created this blog to reach out to the inner cook in everyone. That's right, Mr. Microwaving-is-a-cooking-technique and Ms. I-made-mac-and-cheese-from-a-box-so-that-counts, I want you to run to your kitchen right now, stand defiantly, arms akimbo, and shout "You don't scare me, you uppity kitchen, you!!"(bonus points if your roomate/family member/partner runs in and you just walk out like nothing happened). Don't worry, I'll wait.
Back already? Man, that felt good, didn't it? As you begin your journey into the land of the cooking, I want to help you, which is why over the next few weeks I will be posting my advice on how to set yourself up for success in the kitchen. 

Now before any cooking can be done in your kitchen, you've got to make sure you have some basic tools. Put away the screwdriver...slowly. I'm not talking about those kinds of tools.

When buying kitchen essentials, I strongly suggest going for the best quality you can afford. The cheap stuff is the cheap stuff for a reason. That being said, if all you can afford is the cheap stuff, then you grasp it firmly, march to the checkout like the Viking you are, and buy it. You will have to replace it sooner, and it may have some eccentricities, but work with something enough and you will figure it out.

I have used pans that weren't level, pots that had to have their handles tightened weekly, and spatulas I periodically had to un-bend, but the food still tasted good. Most of the time. I have had some pretty epic kitchen tragedies as well. In short, the better quality/more expensive kitchen tools are usually less frustrating and more durable, but you might find that you prefer some of the cheaper items to their well-off cousins.

I took pictures of some of my kitchen must-haves to go along with this list. Ignore the peaches and coffee canisters in the background. I'm currently ripening peaches and...well...I just love coffee, and when you have a galley kitchen like mine you sometimes get a bit pressed for space. 

The first thing I want to talk about is knives. My mom gave me a nice set of knives for Christmas a couple of years back after helping me with Thanksgiving dinner and deciding my knife collection was sub-par. Now don't get me wrong, if all you have is a butcher knife, a paring knife, and some steak knives, you can get along well enough, but knife sets have a variety of knives for different uses. I rarely use them for their intended purposes, but I have certain knives I like to use for certain things. If you're really interested in learning about knife techniques, then the internet is definitely the place for you. A simple google search will give tons of results.


Pictured from left top, clockwise are paring, utility (serrated), boning (feel free to giggle), steak, santoku, and slicer knives. The butcher's steel on the left is handy to have when your knives go dull. Just read up on how to do it properly or you'll make the problem worse and ruin your blade.
Next is a good stock of measuring cups and spoons for both liquid and solid measuring. These come in a variety of styles, so find ones you like and go from there. I would suggest avoiding the plastic measuring cups with the imprints on the handle for sizes. That stuff washes off crazy easily. See those red cups? Yeah, those used to be imprinted. I will be covering the specifics of measuring in a later post.
At one time I had a full set of everything. I blame gremlins

Pots and pans, as well as baking dishes are a must. As with everything else, they come in a variety of styles, but the design is not just for looks. Different materials and shapes of cookware cook food differently. Start with a pre-packaged set, then add on as you need. I mean really, unless you need a spring form pan for a certain tasty treat, don't get it just because. Unless you're buying it as a present for me. Then that would be awesome.

Mixing bowls are also important. Pictured is pretty much all the mixing bowls I ever use. Most of the time they're pretty interchangeable, but for picky foods like meringue and whipping cream, certain kinds of bowls are better. Once again, I will post about this in more detail later, because this post is a lot longer than i intended and your desire to start browsing through cute kitty pictures is almost palpable.

But what is cooking without the spices to bring the food to life? A good selection of spices can turn passable dishes into transcendent treats for your hungry captive...er...guests. Not sure what to get? Buy a premade spice rack, as well as salt and pepper to start. Over time your collection will grow to the nigh-sentient and bloodthirsty monstrosity that is my spice cabinet.


Remember, I never said it had to be well-organized.

There are literally hundreds of gadgets and gizmos to empty your wallet and fill up your kitchen. Over time you will collect the tools to fit your needs, or if you're like me, you'll have a drawer where seldom - used implements go to die. However, this list should help you on your way to a grand adventure in cooking. Thanks for reading!

Sunday, August 16, 2015

Green tomato goodness

Writer's note: Hello, you lovely, sexy readers. I'm excited about this post, not only because it's delicious, but because I went to visit my parents and made this for them. My mom was kind enough to take photos for me, and did an amazing job. I added more photos to my bread post last week as well, and was sorely remiss in not thanking my husband for taking those pics, as well as saving my phone from a doughy fate.

Green tomatoes are like farmer's  market Easter eggs, but not at one of those children's easter egg hunts. Like...Easter eggs hidden by the guy from "Saw", minus the death and creepiness? Ok, I guess my point is that green tomatoes are a fun summer treat, but can be hard to find.

I recently found some green tomatoes and grabbed them. I paid, of course. I'm not that big of a jerk, although the little old lady behind me who was eyeballing them was pretty disappointed. I slunk away like a villain in a melodrama and gloated  over my haul, trying to figure out what to do with them.
The obvious answer, of course, would be to fry them. I live in Texas, where the answer to many of life's quandries is "fry it," but I decided to start eating healthier a few months ago. I talked to my mom about it, and she said that there are recipes for green tomato soup. I decided to release another one into the world.

Green tomato and zucchini soup

It's ok to lick your screen now.

Ingredients:
2 T. Butter, because of course there's butter
3 cloves garlic, minced
1/2 small onion, chopped finely
(If you're lazy like me, get a ninja food processor and stop just short of liquidity for the above ingredients.)
Chicken bullion cube
5 C. Warm water
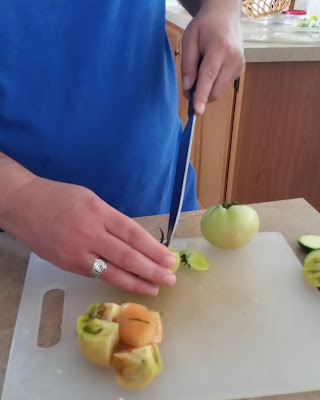
3 green tomatoes, chopped
2 medium zucchini, chopped
(You don't have to get too carried away with the chopping. It'll get pureed later. Cut it until your heart feels good, then go enjoy a nice glass of wine or whatever it is the kids are into these days.)
Salt and pepper to taste

Not pictured: salt and pepper. I'm so sorry for this error.

Directions:
Combine bullion and water to get the bullion dissolved. Set aside. I promise, it wont take it personally. You could use actual chicken stock, i guess, if you hate sunshine, America, and puppies. I wont judge.
Chicken bullion granules are only slightly less patriotic.
 In a large pot (what, you expect me to know sizes?) Melt butter over medium - ish heat. Throw in onion and garlic when butter is bubbly. You know, as in hot, not happy. It could be happy, but how would I know? Saute until your house smells good. Avoid salivating directly over pot.

Wait for it...
Tada!!!!

Add water and bullion. If the bullion isn't dissolved, don't worry. It probably just failed to do so because of its overwhelming sadness over being neglected so long. Also, it will fully dissolve as it cooks. Add zucchini and tomatoes so it has some friends to cheer it up. Add salt and pepper.
Boil the crap out of it. Maybe 20 minutes, maybe 30, maybe you start watching a Law and Order marathon and lose track of time. The important thing is, don't let it go dry. You'll want that chicken stock for the next step.

Such skill!!

Such precision!!

Pictured: happiness.
 Ladle out solids into food processor. hold down the button and maybe reflect on life. Stop when you feel you need to or until it's pureed. Put the puree back into the pot with the chicken stock (told ya you'd need it.). Simmer to get rid of excess liquid. Put in a bowl. Eat it and love it.

Note: Don't use a submersible blender unless you chop finer. Otherwise you just make the soup mad.


Sunday, August 9, 2015

I totally meant to do this

I could have written today's post about a fabulous poached squash recipe that I had planned out and executed flawlessly, but that would have made me a big ol' liar and I would lose loads of street cred. Instead, I'm going to tell you what actually happened and take this opportunity to give a very important lesson in kitchen-fu: mistakes happen. At some point, you are going to screw up a dish. Sometimes there will be no saving it and you will have to dump the food out, in which case I hope it's not terribly expensive to begin with. Maybe less caviar and unicorn tears next time? Most of the time, though, the dish can be salvaged in some way.

I started out trying a sauteed squash dish. I had picked up some yellow squash and peter pan squash (pictured below), along with some grape tomatoes at a local farmer's market, and found a sauteed squash recipe that would use all three.


Yellow squash.


Peter Pan squash. 


 I have to go off on a tangent here for a minute, because it's important to note, and I'm just kind of rambly, so get used to it. If at all possible, I highly recommend going to farmer's markets for produce during the growing season. Where I live, we have a pretty long growing season because the yearly temperature range is slightly chilly to the asphalt is melting. Man, that week of winter is great. Anyway, it is a good idea to read up a bit on how to judge whether or not fruits and vegetables are ripe. I'll be adding a handy-dandy guide for that, at which time this sentence will be replaced by a magical link. In the meantime, if you find yourself looking at a totally alien plant on a nice farmer's stand, do the right thing and just ask them to pick one out for you. I've never had that go wrong. They want to give people the freshest produce because they want people back. Because they need money. To grow more stuff. I think you get my point.

I'll give you a quick rundown on how to look for the vegetables listed here. Let's start with peter pan squash -- I have no idea. Seriously, it looked interesting, so I got one that was firm and white. I guess I lucked out because it seemed ok, minus the skin, which was reported to be edible but sure isn't good.

I am well acquainted with yellow squash. It is one of my favorite summer vegetables. When I was growing up, it was a constant in our vegetable gardens, and the one year I grew a garden as an adult, I ate enough of the stuff to where I'm pretty sure I've now absorbed the squash's power. It has a mild flavor, buttery texture, and goes well with pretty much everything, but that may just be my opinion.  The little squashes are what you look for here, before they grow up and become...I dunno...soccer hooligans? I'm not familiar with what is hip and trendy in squash culture. Ripe yellow squash is firm, but the skin is soft enough to puncture easily with your fingernail. If the skin is tough, it's gotten too big and will probably best you in fisticuffs.

Tomatoes are pretty simple. Whatever the variety, unless you're talking about green tomatoes (spoilers, I'll be adding a recipe with green tomatoes soon), you want a firm tomato but not hard, with no wrinkling or soft spots. Grape tomatoes are tiny, though, so you can't really stand there and squeeze every one. Well, you could, but the old lady behind you may shank you, step over your corpse, and go on with her shopping. Trust me, that's no way to go. Just look for a basket of them that looks good and move on. Chances are they'll be fine.

Ok, so on with the recipe:


Squash Disaster Skillet

Pictured with my Fresh Basil Garlic Bread and Green Tomato and Zucchini soup.
Ingredients:

2 T. butter or so, enough to saute the garlic in. Just don't go crazy with it.
2 cloves garlic, minced
1/2 C. grape tomatoes, more or less
2-3 yellow squashes, sliced. If you eat a slice raw before you start cooking it, I won't tell
1 large peter pan squash, cubed is the best way to put it I guess? It's a weird shape, so I just cut off the top and bottom and chopped at it until the world felt right.
Water, enough to cover the bottom of a large skillet and partially submerge the veggies
Salt and pepper to taste.

Melt butter in a large skillet on medium-high heat. Put minced garlic in the pan, but promptly get distracted and forget about it until the garlic is crispy. Quickly cover it with the squash and tomatoes in some vain hope of smothering the crispness out of it. Mix it around, but accidentally toss some of it out when you stir it too vigorously. Throw away that portion as an offering to the squash gods. Salt and pepper the veggies, then mix the contents of the skillet a little more gently this time. Feel proud that only one tomato escaped.

Watch the skillet like a hawk because of your paranoia induced by the garlic incident. Wait a few minutes, and stir. Notice that the squash is not getting any less firm, but the tomatoes are reducing with lightning speed. Repeat a couple of times, then question your life choices.

Cover the skillet and vow not to touch it for at least 10 minutes. At 9 minutes and 58 seconds, lift the lid and notice how pristine the squash is, as if taunting you. You want me to soften up? Bah! I am immortal, and you are but a simple home cook, it seems to say. Maybe cry a little. It's ok, no one can see you but that evil squash. Furiously look through the recipe you found. Realize that the tomatoes should have been added later and that you really should have read more carefully.

In a fit of despair, pour water into the skillet. Clean up the water that splashed out because you poured it in too quickly. Pour in some more, carefully, until the veggies are about half submerged. Turn the heat to medium and make sure there's a healthy bubble from the water. Cover and pray.

Stir occasionally and breathe a sigh of relief as you see the squash cooking and the tomatoes not burning. Continue to cook until the squash is tender. Congratulations, you have saved the day. Enjoy your dish and bask in the glory of your victory.

Sunday, August 2, 2015

First post go!!!!! Doughn't be afraid.

Welcome to my blog. If you are reading this, then you are going with me on a journey through the mad-capped world of home cookery. That's right, you're going. I don't think it's possible to be charged with kidnapping via blog, but if anyone asks, you know me and everything's cool, alright?

Anyway, I have thought long and hard about how to begin my blog. When the entire culinary world is your palette, where do you begin? I thought about sweet dishes, savory dishes, dishes that are somewhere extraordinarily in between (chicken and waffles ftw!!), but when I got right down to it, I wanted to start with something basic. Something universal that can magically bring family members out of the dark depths of their man-caves and teenage fortresses with its mere smell. I am talking, of course, about bread.

If you're afraid, I understand, but you, my helpless little kitten, have me to guide you. I will take your hand...er...paw...and lead you step-by-step through the dough-making process. Because kittens love making dough, I guess? I don't know, the metaphor was kind of weak to begin with and I lost it. My apologies. The jokes will get better...probably.

First of all, the recipe I'm going to share is a yeast bread. Yeast is really cool to me, because it's a living critter you actually want interacting with your food. Without getting too sciency, I'll give a quick breakdown of what it is. FUNGUS!!! YOU HAVE FUNGUS IN YOUR KITCHEN!!!! KILL IT WITH FIRE!!!! But don't really kill it with fire. Your insurance probably doesn't cover that. This fungus has been used for centuries for the process of making bread dough rise, which is called leavening. To do that, they have to be given food to grow on. What do they eat, you may ask? Sugars, which is why they interact so well with flour and sugar. The kind of yeast I (and pretty much every other home cook in the world) use is the dry yeast. They are cheap and widely available in any baking aisle in any grocery store. I always go for the quick activating or super-duper powerful, sho'nuff gonna rise variety. Regular active dry yeast and I have kind of an on again, off again relationship.

So how do you get the yeast to work for you? You wake it up, of course. Yeast requires moisture at a very specific temperature range to activate. I always gauge it by sticking my finger in the liquid (don't worry, I wash it first, or at least lick it clean). Is it warm? Good. Is it uncomfortably warm? Not good. Let it cool. It should feel like your bath water during your "God help you if you bother me" time, because yeast has to be treated gently.

One last point I'll cover before I get into the recipe itself it how to get a feel for good dough. Though it will start as a sticky, goopy mess, when you keep adding your flour, you will eventually get it to the right consistency. You'll just have to trust me on this, because the first time I made bread, my hands had doughy mittens covering them before I got to the point where the dough decided to shape up. Don't lose heart. Just add more flour and try not to touch anything valuable. You'll know you've gotten to the right consistency (or close) when the dough sticks to itself more than it sticks to you. A good dough will have a smooth texture and elasticity when it is gently pulled away from itself a bit. Still not sure you have good dough? Roll it in a ball and smack it. If it feels like a baby's butt, you're good to go.

And on that happy note, here is my fresh basil garlic bread recipe:


Fresh Basil Garlic Bread 

Ingredients:

5 1/2 to oh, let's say 6 1/2 C. flour
1 package of active dry yeast, not couch potato yeast.
2 1/4 C. milk
3 T. sugar. You can make it a little less sweet by using 2 T. sugar, but we both know you don't want to do that.
1 T. margarine. Butter or shortening works. It's your bread. Do what feels right.
1 1/2 tsp. salt
1/2 C. or thereabouts of fresh chopped basil. 
Helpful tip: after rinsing the leaves, dry them between two paper towels to get rid of excess moisture before chopping.
3 cloves minced garlic, more or less to suit your taste

Take 2 1/2 C. of the flour and mix it with the yeast in a bowl so that they can get all friendly. You will want a pretty large bowl for this, but not your biggest bowl. You'll need that later. Get the electric mixer out and have that ready. As a matter of fact, before you do anything else, flour the surface you're going to be using for working the dough, because once you begin you don't want to leave that dough unattended too long. Having everything laid out in advance helps you and keeps the dough from getting bored.


Put the milk, sugar, butter, and salt into a saucepan and warm it slowly. When the butter is almost all melted (which is another handy way to tell the temperature of the mixture that doesn't involve your finger) pour it into the flour mixture. Beat it on low for 30 seconds while scraping the sides of the bowl as best you can. Sounds easy, right? Beat 3 more minutes on high. This helps aerate the mixture and wakes up the yeasty beast contained therein. 

After you've beaten the daylights out of the dough, get a wooden spoon and stir in as much flour as you can. When it is physically impossible to stir any more, dump your sticky dough ball onto the floured surface. Take off your rings unless you want them to be cooked inside the bread. Sprinkle more flour, as well as the basil and garlic, on top of the dough and then smoosh it in with your hands. Yes, smoosh is an advanced cooking term, but ya'll are smart, so I thought I'd use it. Knead the dough and keep adding flour until it's the baby hiney consistency I mentioned earlier.

Remember how I said you'd need your big bowl? Now's the time. Grease that bad boy up and get it ready to go. Take your dough and pat it into a ball. If you're like me, just make it kind of roundish and put it in the bowl. Turn it over once, cover the bowl with a clean kitchen towel and stick it all in the oven. Do not, I repeat, do not turn on the oven. You're giving the dough a draft-free place to rise. Go organize your sock drawer or something for about 45 minutes, at which point your dough should have doubled in size. If you killed your yeast accidentally, it won't rise. Don't worry, this happens. The investigation will mostly be for show and the paperwork is minimal. 
If your dough has risen, punch down right in the middle of the dough. Didn't that feel awesome?
Sorry, but you don't get to do it again. One punch per bread recipe. Dump the dough onto a floured surface, maybe the same one you used earlier, maybe another if you didn't have the gumption to clean the excess dough from the earlier step off the other surface.


Divide the dough in half. Cover it and let it rest for 10 minutes. It's had a rough day, what with being punched and all. Shape the dough into two loaf-like shapes. The bread doesn't know the difference. Ugly bread still tastes good, so don't be afraid to experiment with shaping. Grease a cookie sheet (we don't need no stinkin' loaf pan!) and set the loaves on the sheet. Cover again and put it in the still-not-turned-on oven for about 30 minutes. It should double in size by this time. 

Take the loaves out of the oven. This is very important, because you will want to preheat the oven to 375 degrees F. Bake them for 35 minutes, or until they're done. A good way to tell if is to tap the outside. If it sounds hollow, it's done. Inhale as deeply as you want to take in that great smell. Try to let loaves cool below mouth-meltingly hot before you try the first slice.
Oooooooh. Aaaaaaaah
It's braided because I felt fancy that day.